 |
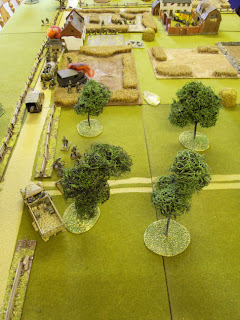
| German transports hit at extreme close range by PIAT teams in the building they were trying to take. |
This latest engagement had a British paratroop company having to temporarily halt its advance towards a bridge sector, to deal with an isolated German unit approaching from the rear in transports. The Germans were elite units, but mainly armed with sub-machine guns more suited for street and building fighting.
 | ||
| German transports start to take PIAT fire. |
Once the road was blocked with their burning transports, some Germans jumped the fence to the left of the road to advance the last few yards to the building. A paratroop rifle squad in the woods beyond the building opened fire pinning them. The German infantry could not return fire as they had short range weapons (SMG).
 |
| Rear transports dismounting for the woods route |
Other disembarking Germans tried to go to the right of the road across harvested fields offering very minimum cover from the unharvested edges and corner of the fields. Units further back in the column dismounted and took a route through the woods in the centre of the map. Both routes looked a fair (but risky) option, especially as the key building was a barn actually adjacent to the crop field. Also the elite German troops with SMG's, would only need minimal troops to enter the building and deal with the PIAT teams.
 |
| The far barn roof view (Para HMG position) |
As it happened, a Para HMG was set up in a barn on the other side of the battle area. By constantly moving the weapon and setting it up alternately between 2 windows at 90 degrees to each other, the HMG team manage to cover both German advance routes. The Germans did move 2 HMG teams to fire from the edge of the woods (the second HMG being a complete surprise to the Paras), but the Para HMG managed to take one of these out (when it was in woodland cover too!), which made the second one decide to withdraw because a Para squad had moved to the edge of the nearby cornfield and could charge (which they'd never have done with 2 German HMG's) .
Eventually, all German units were pinned, suppressed or in cover they dare not step out of. They gradually started to withdraw. Heroes of the day were the PIAT teams who stopped the convoy, and the single Para HMG team in the far barn that stopped anything moving forward (and destroyed it's German counterpart in woodland cover).
Because this battle is part of a campaign, the result is not so clear. Both sides withdrew valuable troops for later engagements, but just by engaging, the Germans have delayed the Paras advance towards a bridge sector. Arriving later could have bigger consequences down the line, as German armour and reinforcements may now have the time to be in wait for the paras. This really is the beauty of campaign systems!
No comments:
Post a Comment